


Soap craft is a wonderfully diverse thing. So many methods, so many aspects, so many stages, phases and outcomes, and endless possibilities for creative combinations.
To me the notion of taming the soap holds a very special charm. To be able to control a potentially hazardous substance like lye (aka sodium hydroxide aka caustic soda) and by combining it with rich oils turn it into a benign, gentle and conditioning skin care product is just very cool. It’s pretty basic chemistry, but it’s also a little bit like magic and after years of making soap it still excites me. To me it’s fascinating to try to wrap my mind around the practical implications of the chemical reaction involved; to troubleshoot and to try to predict how changes to method or formula will impact the final outcome.
But not everybody is that way inclined.
Lye is highly corrosive and potentially very dangerous. In order to safely work with it and consistently turn it into safe soap of high quality, you need to know what you’re doing and what you’re dealing with. You need to be familiar with and follow safety procedures to protect yourself and your environment, you need to put systems in place to avoid human errors, you need calibrated equipment and you need to be able to verify that the lye calculation is correct for whatever soap formula or recipe you are using.
This may seem daunting and if you can tell that the things mentioned above are beyond what you are interested in doing, then soapmaking from scratch is not for you. It’s that simple.
Working with active lye is also not a suitable hands-on activity for children. It’s fantastic if your nine-year-old has exceptional fine-motor skills, great coordination, is highly gifted and very careful; nevertheless it’s not right to give a child the kind of responsibility it takes to work with lye – even if you intend to supervise the process yourself.
Luckily there are alternatives, and you can do wonderful creative craft with soap even if you don’t actually make the soap yourself.
Melt and pour soap is a good alternative for those who – for whatever reason – shouldn’t or don’t want to work with active lye. Most melt and pour soap base is soap made with lye like any other true soap, with additives to make it melt easily to a liquid that you can add fragrance and colour to and cast in moulds (traditional soap made with just lye, oils and water will not easily melt to a liquid). Because it’s a ready-made soap, it cuts out the need for the soap crafter to work with active lye.
When it comes to working with melt and pour soap I’m a complete novice. Unlike many other soapmakers I didn’t begin my soap craft by melting and pouring pre-manufactured soap; instead I went straight to making cold process soap from scratch. So, in spite of making cold process soap for years, I only recently bought my first stick of melt and pour soap to experiment with. Now that I knew how to make soap myself I was keen to see what working with pre-manufactured soap would be like.
So far I think I’ve only scratched the surface of melt and pour soap crafting. I have, however, come to realize that the melt and pour crafter faces a different set of challenges from the cold process soapmaker, and I lift my hat to the melt and pour masters creating beautiful works of art in this medium. While the principle is easy enough – melt, stir in fragrance and colour, and pour – it takes a lot of practice and some tricks to truly master the finer points of melt and pour soap crafting.
Here in South Africa local melt and pour soap is readily available in many craft supply shops. Unfortunately these sticks of soap often come without any labelling – despite the fact that skin care soap is cosmetic and is required by law to come with a full list of ingredients. For me as a soapmaker and melt and pour hobbyist the product is just a little suspicious if the manufacturer seems reluctant to disclose the ingredients. For the aspiring professional melt and pour crafter it’s more problematic: you can’t sell your pretty creations unless you can specify what the ingredients are in the soap base that you are using.
So, I was quite excited when I recently got the opportunity to experiment a little with some melt and pour bases from Stephenson Personal Care in the UK. Stephenson is an established soap base manufacturer with long traditions in soap making. Their product range is impressive with all kinds of specialized products for melt and pour crafters and information about the company and its products is readily available online.
I got a selection of Stephenson bases to play with and I had plenty of fun in the process. It was like being invited to a party where the entertainment has been organized by somebody else and all you have to do is sit back and enjoy. There’s definitely something to be said for the instant gratification in crafting and fragrancing a pretty bar of soap half an hour before taking a bath with it! 🙂 Much faster and much less messy than making cold process soap from scratch.
Having just travelled extensively and very successfully with my cold process travel soap in a tin, I decided it would be handy to have shampoo in the same kind of format: tiny, single use shampoo bars that you can keep in a small container without the need to re-pack liquid shampoo into small bottles to avoid airline hazzle. These are some of the baby-size shampoo bars that I made with Stephenson’s Crystal Solid Shampoo base. A bit of light colour and fresh fragrance and we have a lift-off!


I cast these in plastic chocolate moulds that I usually use for cold process soap embeds. And who knows; even those who most vocally profess that having your hair washed is overrated, may just agree to have their hair washed once or twice when shampoo comes in this shape 😉

The next product to try was the Crystal SLES and SLS Free melt and pour soap base. SLES stands for Sodium Laureth Sulfate and SLS for Sodium Lauryl Sulfate. The base comes both in a clear and an opaque, white version. I used the transparent base and added a little titanium dioxide when I wanted to make it opaque.
And yes, this see-through effect you can’t achieve with ordinary cold process soap.


The embeds were made by shaving curls off a piece of turquoise opaque soap and then pouring transparent blue soap over the embeds. I learnt that you need to be careful with the temperature. If your melted soap is too hot you might end up melting your pretty embeds with it.
Still inspired by my recent travels I also made these very small guest-size soaps, great for single use purposes. The contrast between the opaque and the transparent soap is pretty striking.

Just love those little life buoys bobbing on the old maritime chart that I bartered for some cold process soap on my last trip to Helsinki 🙂


Next up for testing was Stephenson’s Crystal OPC Foaming Bath Butter; another versatile product that I was keen to try. The soap base is fairly soft at room temp and once melted you can whisk it and create various fabulous ‘fluffy’, foamy things.
Working with it took a bit of getting used to. I found that temperature once again is something you need to be careful with. As long as the base is hot you can keep on beating it and incorporating air into it, but as soon as the temperature drops to a certain level your fluffy mousse starts to crumble. Luckily we are dealing with a very forgiving melt and pour product here; if it doesn’t turn out exactly like you want it first time around you can melt it down and start all over again without wasting anything. And the crumbly texture is quite nice; it looks remarkably like snow – or ice cream.

The testing group here at home quite liked the ‘soap butter’ simply whipped, but was especially fond of the foaming sugar scrub that I made from the bath butter by adding a generous amount of castor sugar – along with some finely ground hibiscus flowers for soft natural colour and a lovely essential oil blend of lavender and sweet orange.

My last experiment with the bath butter was one that I had wanted to try for a long time and the reason I chose to try the bath butter in the first place. Bath bombs are popular but I’ve never made a bath bomb in my life. Bath bomb recipes often include oils and since I’m not particularly keen on bath products that leave an oily film in my tub I knew I’d have to add surfactant of some sort if I wanted oils in the bomb but not on my tub. I wondered if the bath butter might do the trick and so I tried it.
Now, without meatball tongs or any other bath bomb shaping device I wasn’t going to be able to make traditional, super smooth bath bombs. But I wasn’t too perturbed by that because when it comes to balls I have a competitive edge 🙂 Being a Finn I have had years and years of snowball-making practice (one of the few perks when living in a freezer) and that served me well in this case. With a little bit of added oil and a little bit of melted bath butter mixed into my sodium bicarb and citric acid, I had a mixture that looked and felt a lot like snow and it was an easy task to shape it into hard spheres. Slightly irregular free-hand spheres, but spheres never the less.

Did my bath snowballs work in the tub? They did indeed – making foam and fizz as they disintegrated and released their essential oils – and leaving no oily film in my tub 🙂
A final product that caught my eye among Stephenson’s range was the Crystal Suspending melt and pour base. Normally you can’t suspend anything much in liquid melt and pour base. Whatever is lighter than the soap will float to the top and whatever is heavier than the soap will sink to the bottom. Usually, if you want anything like embeds or exfoliant particles suspended in melt and pour soap, you’ll have to add them and the soap gradually in layers that need to set up before further layers can be poured on top. Here you can mix your particles into the melted, hot soap and pour everything in one go. Handy – non?

In this soap nougat the embeds were made in the Crystal SLES and SLS Free melt and pour base and then mixed into some hot Crystal Suspending base coloured with titanium dioxide. Very proud of that red which is a combination of neon pink pigment and red iron oxide.. Fairly pleased with the colour of the ‘toasted almonds’ too 🙂 Pretty, but there was a very particular project that I really wanted to try the Crystal Suspending base for.
I have used ground cork as an exfoliant in cold process soap before. Cork is a fascinating plant material. It’s the bark of the cork oak, Quercus suber, which is native to the Mediterranean region. The bark grows thick and protects the cork oak from forest fire. Where cork oak is used commercially, the bark is harvested every 9-12 years without harm being done to the tree. As an exfoliant in soap, cork is interesting because it is elastic, ie it has a nice scrubby effect but is never scratchy, it is sustainable, natural and fully biodegradable – and it floats. The fact that it floats means that grains of cork rinse off easily and don’t sink to the bottom of drain pipes to clog them.
Because cold process soap is not clear you can’t really see grains of cork embedded in cold process soap. But in clear melt and pour soap you can see the grains and since you can suspend things in this particular base you can make cork soap that looks like real cork. And I so happened to have little conical moulds perfect for this project..
Ground cork is not something that’s readily available for purchase around here. So, if you need to produce your own you have a couple of options. You can be romantic and go out and harvest some cork off a nearby cork oak, boil it to get rid of dirt and bugs and then grind it. I’ve done it because I live in a region where cork oaks grow, but if your neighbourhood doesn’t sport a lot of cork oaks you’ll have to think of something else.

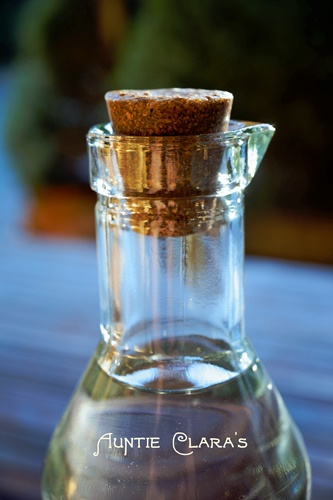
A good source for very clean, natural cork are shops selling supplies for hobby wine makers and if you want to make cork soap for sale you may want to go that route. If you do chose bottle closure cork, you might want to look for traditional cork and not DIAMs or other brands of agglomerated cork which contain synthetic binding materials. For my own hobby project I upcycled some used wine bottle stoppers which for some reason I seem to have a lot of.. 😉
Grinding cork is not as easy as you might think. The trusty old coffee grinder had nothing at all on the elastic and super light cork which happily bounced off the blades. What did work very well though was my workhorse of a cheese grater.

I used about the same volume of ground cork as suspending melt and pour base for these little ‘corks’.

Looks like pretty authentic agglomerated cork to me. And yes, they do float! 🙂

Taking the floating cork soap concept a little further I made some cork soap on a rope. This is the same suspending melt and pour base but with a little added pigment making it opaque. Looks more like concrete than cork, i.e. the clear soap just works better for this…


Well, that was a fun break and it goes to show that you can do lots of wonderful, creative things with melt and pour base. If being creative with colour, fragrance and texture is really where your heart is then melt and pour soap crafting has a lot to offer. Some good news for South African melt and pour crafters is that Stephenson Personal Care have signed on a distributor in South Africa and their plan is to make the Stephenson melt and pour soap bases available locally before too long.
And now back to business as usual, re-stocking some cold process soap..
Joan
Your story writing & photography is as wonderful as your soap making.
Very interesting about using shredded cork in soap….thank you.
Clara
Thanks! Glad you enjoyed it!
Sly
Clara:
Thank you for sharing such a fun & informative article. I love all the little treats you made – from buoys & anchors to airplanes, corks, and butters.
We made our own wine, so I love the idea of putting cork in some wine soap! (Your little cord soaps in clear MP are adorable!)
I have made bath bombs many times, but not with bath whip/butter. Do you have a recipe that you are willing to share?
Thanks again – I always look forward to your blog!
Sly
Clara
Thanks! For these hobby projects I didn’t measure very carefully; I just added a tiny amount while mixing everything in my mixer, just enough to be able to shape the mixture.